Showing posts with label fabric. Show all posts

Thursday, 11 August 2016

257. Gift Sketchbook for CM

Hardbound, handmade Sketchbook, 5.5" x 5.5"

We're going to Jamaica! My niece's best friend told me that when my niece has nothing to draw on she draws on her hand. I knew then what to take for her. This one is bound with Japanese silk, Gamma purple bookcloth and Japanese 'wove' decorative paper.

The greatest thing about being able to make a gift for someone is that not only is it unique but it's also from the heart.


Sunday, 17 July 2016

242. Gift Sketchbook for RM

Hardbound, hand-made Sketchbook bound with
various types of paper for drawing and painting, A5

Got this stitched, cased and pressed in the nick of time! I made the bookcloth as I'd seen and liked this fabric quite a few months ago.

(Posted later.)

Thursday, 5 May 2016

235. Pink Tulips

Derwent Coloursoft pencils and Pilot G-tec C4 pen
on Fabriano watercolour paper 
in a Sketchbook that I stitched and bound 5.5" x 5.5" (x2)

This sketchbook is covered with bookcloth I made from the same blue fabric I used for my tote/sketching bag (post number 127, April 2015). It started as a pen and ink doodle and grew from there. (Glad I started it sideways!)

Tuesday, 15 March 2016

228. Gift Sketchbook for MD

Hardbound Sketchbook, 5.5" x 5.5"
(for the process, please click 'Bookbinding' in the 'Labels' list to the right)


Thursday, 10 March 2016

226. Throwback Thursday - Sketchbook

Quarter Bound Hardback Sketchbook, 5.5" x 5.5"

Felt I wanted to post something but wasn't sure what so I've dug out these photos of a sketchbook which was a gift for an artist whose birthday was on Valentine's Day. As in some of my other sketchbooks, I stitched in two types of paper so inserted identifying notes.
Bookcloth made for the 'Quarter'
 

Tuesday, 8 March 2016

225. Pleased as Punch!

Two 'Quarter Bound' Hardback A5 Sketchbooks:

A5 Chunky (laying flat) and...
… A5 Slim
Levitating in my office

You probably know me by now - when I bind a book, I want it to be bound traditionally, to last for decades and also to be fit the purposes of the recipient. For a while now, I have been researching how to achieve 'lay flat' binding in a chunky book with a rigid (not rounded) spine - a ton of stuff has been written about it on bookbinding forums, etc.

It has been suggested that the only way to achieve it is to use or buy one of three machines which seals it with an adhesive. Apparently, the only way to achieve a 'lay flat' effect by hand-stitching is to use coptic binding but, although the books are absolutely beautiful to look at, not everyone wants to work with all that stitching down the middle of some of the pages. I felt I had to try to perfect it by hand and have been scrutinising numerous case bound, stitched books to see the difference between those that lay flat and those that dip in the middle.

I was recently asked to make a book with a lot of pages which, again, would contain some drawing paper and some watercolour paper - the paper I used is the lovely Fabriano 5 watercolour paper so it's quite thick and thus weighty. She chose her fabrics from my little selection and I made up some bookcloth. (The spot is for someone else.)

Anyway, I am pleased to report that thanks to a lot of research and some experimentation (as well as prayer!), it has finally worked! Yippee!

I threw in the smaller book, as a gift, which contains Fabriano 4 fairly smooth watercolour paper that she can use on the train or at sketchcrawls, etc., where you often have to stand and sketch/paint and, instead of the ribbon close used for the chunky one (which would be fiddly in the field), I put ribbon along the edges of the 'quarter' so it would match it's sibling.


 Making book cloth
Bookcloth made!
Textblocks stitched and ready for the 'chunky' and
one ready for the spotted bookcloth
Handmade 'stamp' in back endpapers
Ooops! Forgot to rotate the photo.

A few more random pics of the chunky...
 
(two bookmarks for ease of reference)

… and of the slim one.
Thanks for reading this far; I do appreciate you all!

Friday, 25 December 2015

210. Another Gift Sketchbook and WIP Pics

Hardbound Sketchbook Gift, 5.5" x 5.5"
(more photos of the finished result are at the bottom of this post)

(There is only one rule in bookbinding:
The grain in the paper, cloth and board must run from head to tail.
City & Guilds)

I have two friends who are 'two peas in a pod'. They call themselves 'Batman' and 'Robin'. Robin has in the last five months discovered she has a previously unrealised gift for art - it's been quite a revelation to us all - her included! Batman thus asked me to make Robin a sketchbook for Christmas that would be small enough for her handbag and also fairly lightweight.

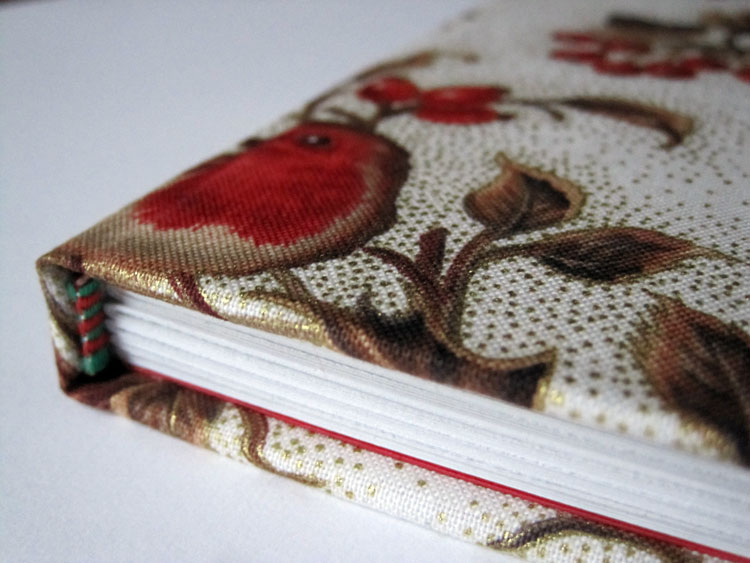
Robin is a wildlife lover and avid photographer and, while we were deciding on the right cover, we came up with the idea of a 'robin' theme. Ordinary paper is not brilliant for book covering; you really need something stronger and flexible enough to fold around board, which is the idea of bookcloth. I found this gorgeous print in a fabric shop in St Albans - the owner has been there for 40 years and I always find what I'm looking for there. I used tissue paper and Bondaweb to turn it into bookcloth (that's bookcloth is made) and the rest is history! 

If you're interested, there are work-in-progress images below. Happy creating everyone!

 After folding and arranging the signatures, I guillotined them into a square format
then stitched them with waxed thread 
using three pieces of  sewing tape for spine strength
 Only six signatures this time (it needs to be lightweight)
Glued between boards then a ribbon bookmark added a bit later
Headbanding added and everything held in place with 
again with rough boards and bulldog clips
A better view of the headbanding (red and green tips)
… snap happy!

After this, I added mull around the spine for strength and also a heavyweight paper spine.
(I omitted to photograph them but you can see mull and a spine in my November post - or click "Bookbinding" in the 'Labels' list on the right and it'll take you there.)
Homemade bookcloth with boards and spine measurements marked on the reverse.
Aligning the grain in each case, I made the bookcloth using a layer each of the strong
cotton fabric, Bondaweb and white tissue paper (ironed as per the instructions).
This ensures no glue seeps through onto the fabric part of the bookcloth.
The right side of the bookcloth.
(Grain direction marked with arrows on the boards.)
I made the 'case' and scored the two spine seams with a bone folder.
Then, with a knife, I cut two slits an inch from the edges and eased the ribbon through. I hammered the slits back into place so the ribbon was taut and the boards flat again. Finally, I glued the entire length of each ribbon onto its corresponding board to ensure it will not break free over time. 

At this point, I attached the red endpapers to the text block then visited my lovely printer who chopped the edges of the text block for me. Not only does it make it look neat
but it is easier to flick through the pages if the sheets are aligned.
I then attached the endpapers to the case.
(This is the back one - the text says "Stitched and bound by Sharon Veares")
A few pics before it's given a 12-hour press
… it's just showing off now...
 It's tired now - all that modelling!
I untied the bow and moved the ribbons and the bookmark out of the way of any glued parts before placing boards on top and underneath for pressing.
Glassine paper (or the like) between the endpapers ensures that any 
undetected glue spots won't stick them together in the pressing process.

It's finished!
The top
The top (again)
The bottom
The back cover
The front cover.

The size had to be specific so I am really, really pleased that the pattern ended up just as she wanted it - on both the covers - quite frankly, as this time the cover is one continuous piece, it's a miracle!

(I can't risk posting this until Christmas Day, just in case…..)